Sweet Potato with Miso

So I recently finished watching Salt Fat Heat Acid on Netflix. It’s EXCELLENT! Samin, the host, who is from Berkeley and worked her way up at Chez Panisse, is somewhat of a new age idol. Her show is a mix of cooking technique, recipes, travel, and community all in one. It’s beautiful to watch and Samin reminds me a bit of a Julia Child in that she makes cooking so approachable. In one of the episodes, she travels to Japan to learn about salt. Miso, which Westerners usually know as miso soup, is an umami paste that can turn anything into something really special.

So with not much left at home in the pantry or the refrigerator, I made a “miso butter” with equal parts butter and miso paste and topped a slow cooked sweet potato for lunch. It was good enough I figured I would add the how-to on the site. Hope you find this easy meal a hit for those lonely nights where you’re cooking for one… yep, we all have them!

2F421D54-7975-4C1A-8475-A364F532906D.jpg

Slow Roasted Sweet Potato with Miso Butter

Serves 1

1 sweet potato, white, also works with yellow sweet potatoes or Japanese varieties

2 TB miso paste

2TB butter, organic

1 TB olive oil

Fresh cilantro or Basil

Turn the oven to 300F. Prepare a cookie sheet with parchment paper or a silpat. Coat the potato with a bit of olive oil. Roast for close to two hours, or as long as you can hold out! In a small bowl, mix together the butter and miso paste until well combined. Split the potato and add the paste and top with fresh herbs.

Lentils in Curry Sauce

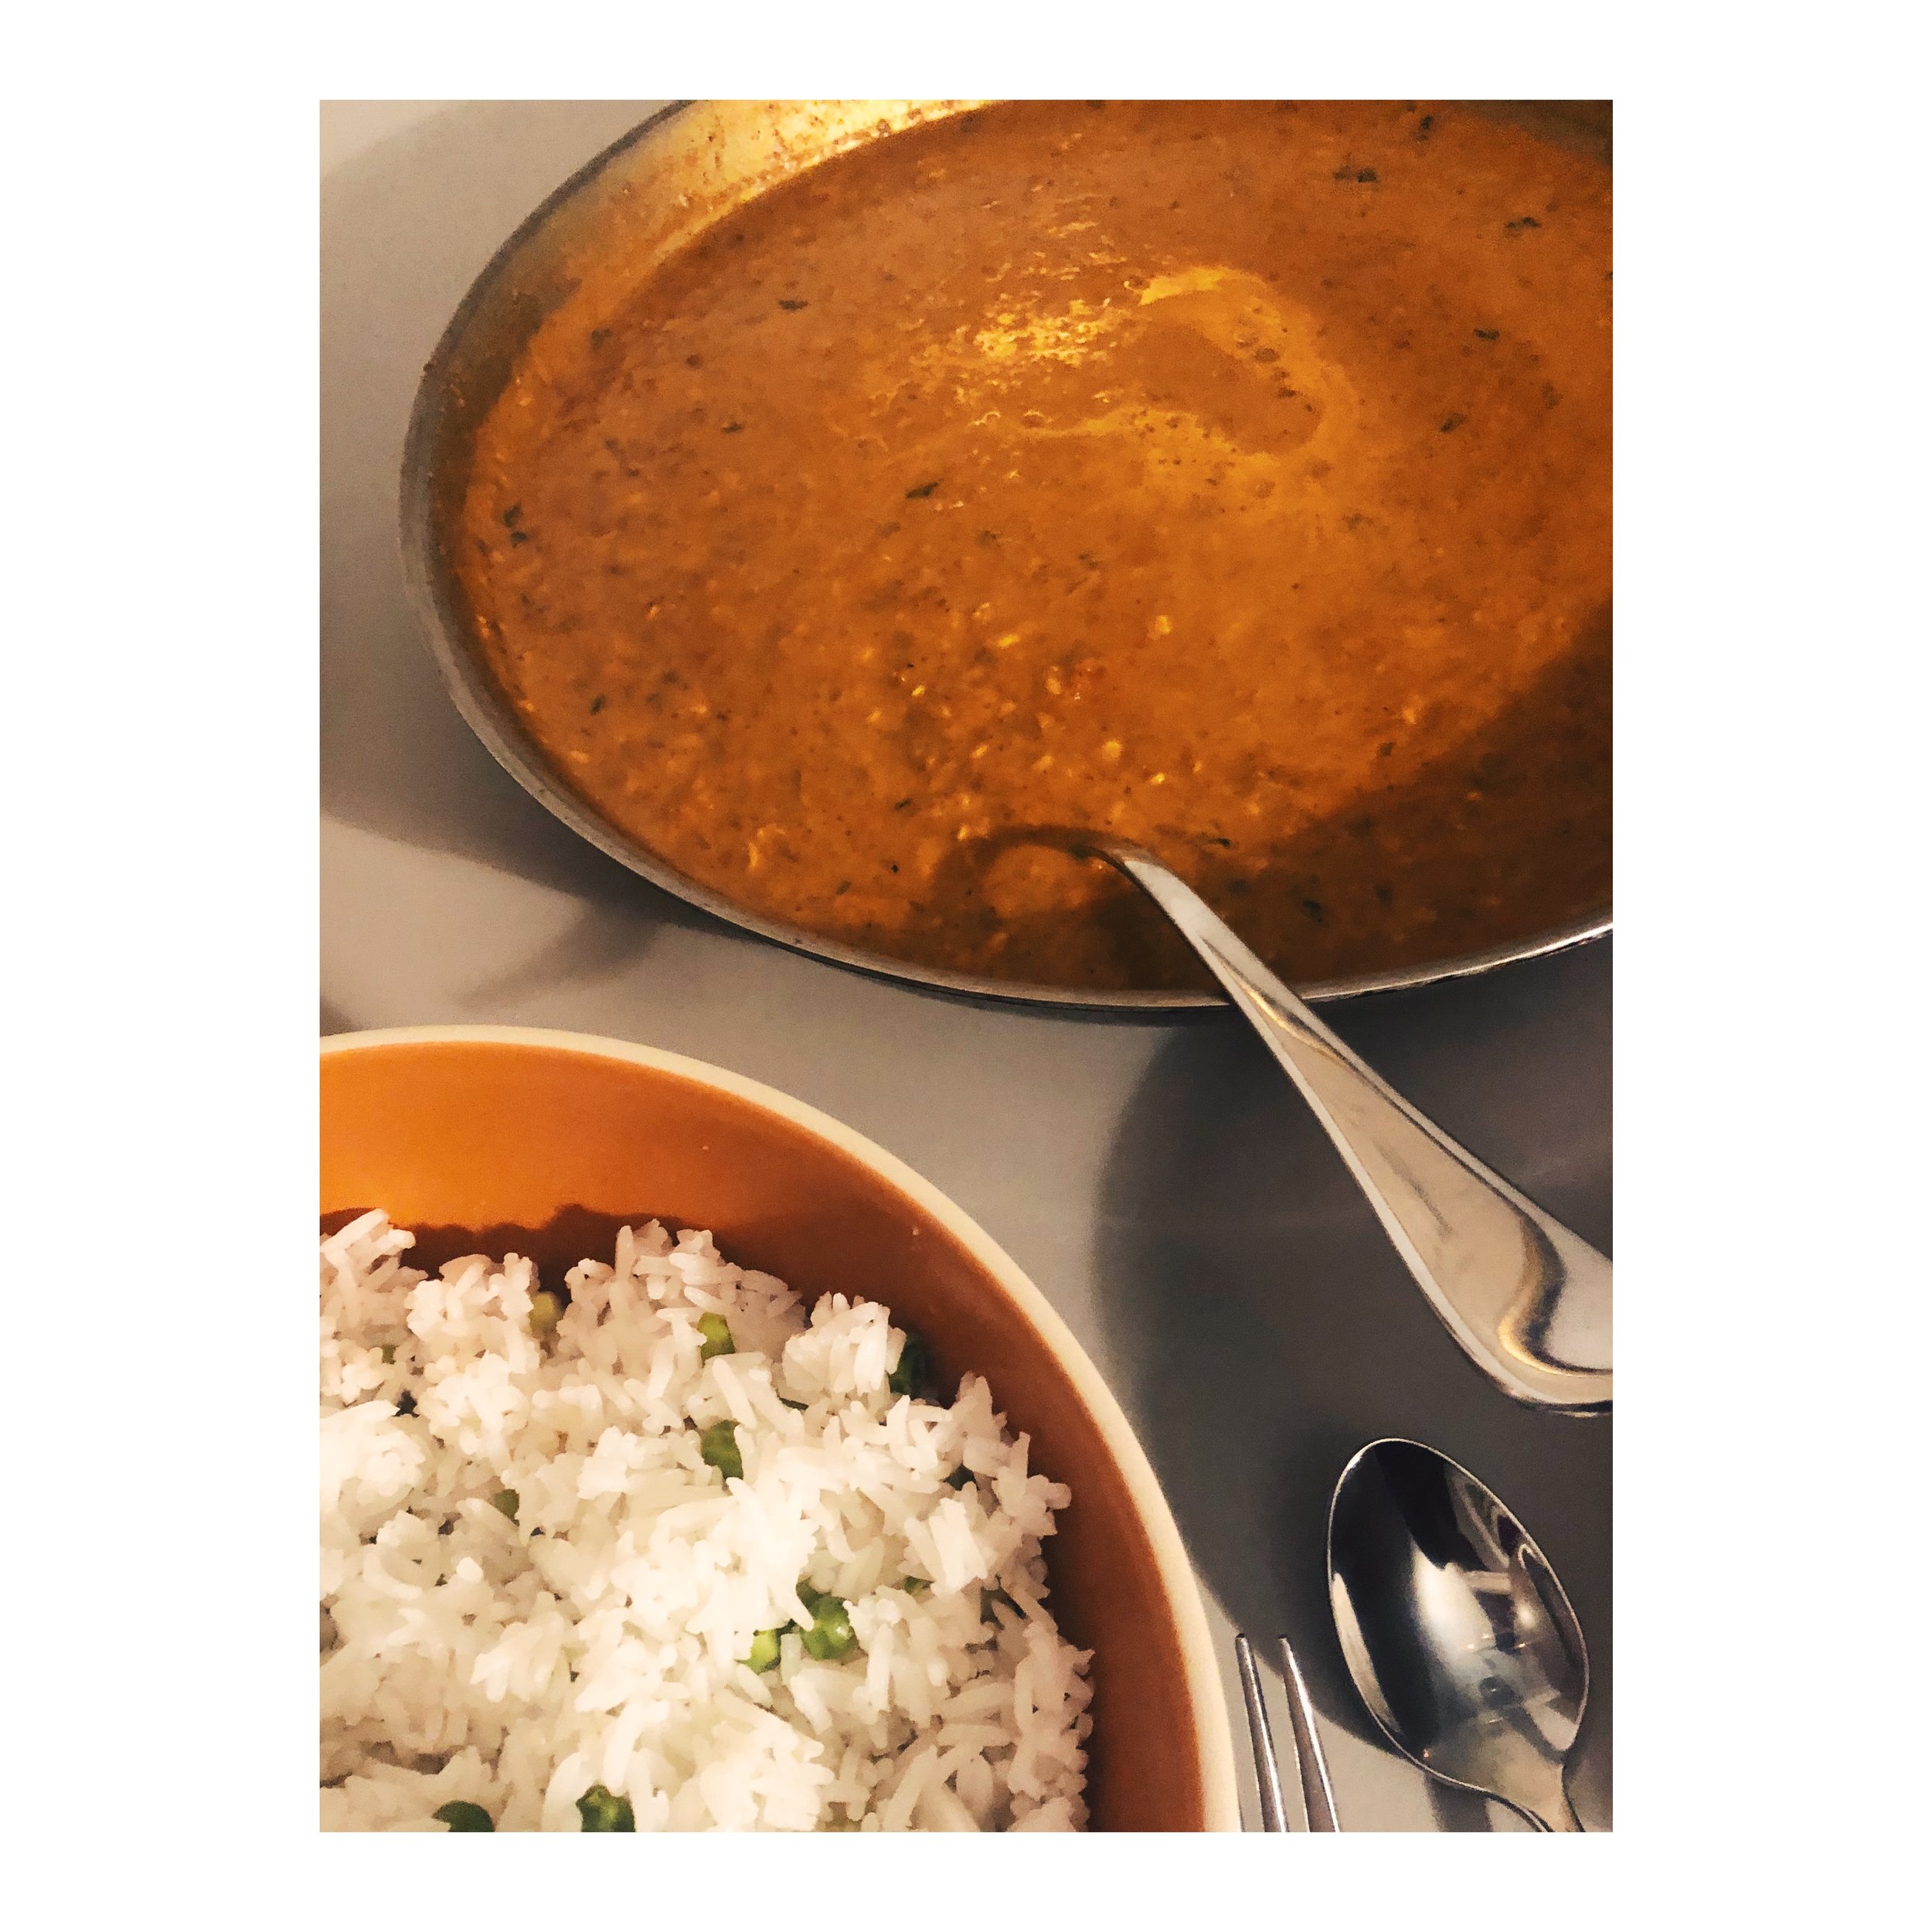
Holy smokes this recipe was 10 times better than I thought it would turn out. I love lentils and have forever been fond of them since my grandmother would make a french lentil soup often when I was a kid.

I usually keep a jar of lentils in the pantry for weeks when I am trying to curb our spending a bit. They are protein packed, inexpensive, and vegetarian / vegan friendly. I originally intended to make a Southeast Asian curry, with lots of ginger and coconut milk and lime juice. But at the last minute, I was inspired to veer toward warm spices and Indian flavors. My husband and I love the spicy and rich flavors of Indian cuisine. I am constantly looking for more vegetarian recipes to make at home that are satisfying and make for great leftovers. The result of this Indian curry was stellar and I plan to incorporate this dish into our regular weeknight meal rotation! I hope you do as well.

2CD6733C-2B79-4EB2-843D-5F11D8F06856.JPG

Curried Lentils

  • 3 TB coconut oil

  • 3 TB curry powder, or 1 tsp each cumin, coriander, and turmeric

  • 1 head of garlic, chopped finely (10-12 cloves)

  • 1 small yellow onion, chopped finely

  • 1 28oz can of crushed tomatoes

  • 3 TB ginger, chopped finely

  • 1 C dried brown lentils

  • 1 15oz can coconut milk

  • 1 C chopped cilantro


Heat a large saute pan or dutch oven with coconut oil. Add the curry powder and toast for 1 minute. Then add the garlic and onion and saute for 3-4 minutes until softened. Add your ginger and continue to stir until the oil is mostly absorbed. This recipe calls for a lot of ginger so feel free to cut down on it if you are not a huge fan. I can’t get enough of this root! At this point, your ingredients will look like a thick brown mess. Add the can of tomatoes as well as 3 cups of water or vegetable stock and the cup of lentils. Turn the heat on high. Once the liquid reaches a boil, turn the heat to low and cover for 30-40 minutes until the lentils are soft and cooked through. Taste the dish at this point and adjust as needed. For example, add chili powder.

Add coconut milk, and season with salt, cayenne pepper, and fresh cilantro. Stir until entirely combined. Serve over basmati rice and top with a spoon of good quality organic yogurt. Voila, Indian made at home!

** Turn your rice cooker on once you add your lentils. Rinse the rice 2-3 times to remove the starch. I do this right in the rice cooker pot. Then I throw in 2 cloves and 6 cardamom pods. I have a steamer basket in my rice cooker and add in one cup of frozen peas. By the time your curry is complete you can be up and running with an Indian rice pilaf.


2315C78D-4769-4B00-BB06-A1E50DE74DE3.JPG

White Bean Winter Soup

White Bean Soup

In the winter months, I live for a hearty soup with good crusty bread. I find this type of soup incredibly satisfying and comforting. You really feel warm all the way through to your bones! The trick is very good chicken stock. It also helps to have quality beans. I tend to think because it’s very simple, every ingredient really matters. Double the recipe and freeze some for later! The soup is always better the next day so feel free to make it ahead of time.


White Beans Winter Soup


1 quart of cooked white beans, cannellini or gigante

1 quart homemade chicken stock, or buy from your local butcher

2 tb olive oil

2 cloves of garlic, roughly chopped

1 yellow onion, chopped (optional)

1 large zucchini and/or 1 large carrot, diced ¼” thick (optional)

1 small bunch of collard greens, chard or escarole, de-stemmed and chopped 1” pieces

1 dried red Calabrian chili

Salt and Pepper

Parmigiano Reggiano


If using dried beans, soak the beans overnight in a large bowl with plenty of water.


Bring a stockpot or heavy dutch oven to medium heat, add the olive oil, and sweat the chopped garlic. If you love onions, add a chopped yellow onion at this point. Saute for a few minutes until the garlic is cooked and the onion is softened. Add your washed and sliced collard greens. Stir a minute or two and then add ½ cup of chicken stock. Cover for 2-3 minutes until the greens are steamed. Add the zucchini and/or carrots and continue to stir all together. By this point your chicken stock should be mostly gone and your vegetables should be softer but not cooked through. Add the white beans and cover by 2” with liquid, adding the remaining 3 ½ cups of stock. Add water if you need to as well. Bring the pot to a rolling boil and then lower the heat to a simmer. Add the chili and cook with the lid on for 20 minutes. Taste your soup, and add salt and pepper to taste. Are the beans soft? If not, continue to cook with the lid on until they are cooked through. Leave it covered until ready to serve.


In the bowl, drizzle with olive oil and grated parmesan. Serve with good crusty bread! Maybe a glass of red wine. Some gooey, stinky cheese.  Eat on the floor around the coffee table or by a fireplace. OK, you get it.


Best Broccoli Ever

A few weeks ago I hinted at the best broccoli recipe ever. It’s my husband’s favorite and takes a simple ingredient and elevates it for any type of eater (vegetarian, vegan, carnivore, etc). It’s a riff on Italian style cooking which uses great olive oil to enhance an inexpensive seasonal vegetable into a great side dish. This broccoli recipe can be substituted with asparagus, cauliflower, brussel sprouts, broccolini or any other hearty vegetable.

63797044-5083-436F-9ED5-033E121412EB.JPG


Best Broccoli Ever


1 head of broccoli

1 fresh small red chili

4 cloves of garlic

¼ cup of olive oil

½ Lemon

Kosher salt


Bring a small 8-10” saucepot with water to a boil. While the water is heating, prepare the broccoli by cutting off the hard end of the stem. Then slice broccoli flowers lengthwise and leave a lot of the stem on. The stems are full of flavor and have a great texture to contrast the head. Place in your serving plate or shallow bowl.


Slice the garlic very thin legnth-wise or just chop into large chunks. Chop the red chili the same way. Fill a mixing bowl with ice water and reserve. Then add kosher salt to the boiling water and add the broccoli for 4-5 minutes. Once it is just barely cooked through, drain into a colander and add to the ice water to stop it from still cooking. Once the broccoli is bright green and cool, drain the broccoli back in the colander.


Place the same saucepot back on the stove and turn on the heat. Once all the water is evaporated, add the olive oil, garlic, and chili. Cook on low heat swirling the pot until the garlic is golden brown. Careful not to let the garlic burn! This should take 60-90 seconds. Add the broccoli to the pot and toss in the garlic chili oil for 30 seconds, using tongs as needed. Squeeze the lemon on top and then plate into the shallow bowl or plate.


Corn Succotash

It’s the end of summer. We just passed Labor Day and for the first time in a long time I am truly sad to see summer wind down. Living in the Bay Area for eight years I actually forgot about seasons! You see right now the weather is just about to become gorgeous in Northern California. They have an “indian summer” meaning that the warmest months are September and October. Now that I am living in the Pacific Northwest I feel a serious weather change. It cooled down substantially. Those days of 90 degrees are not coming back for many, many months. The other huge change is the sunlight! It was incredible to dine outside every night for the past two months and be out on the deck until 9 or 10 PM sitting under the stars, sharing a meal, and having great conversation. Now, by 8PM I’m too cold to be out there and tonight we actually ate… inside!


We still are using our outdoor grill because I refuse to not cook on there until the rain starts. I absolutely love the char on vegetables and fish. We had some Alaskan Salmon fillets and a home-run corn succotash. My favorite part? We used a bunch of last week’s leftover grilled zucchini that was on it’s way to the compost bin if we didn’t save it. Feel free to use fresh grilled or roasted zucchini and not wait a week to eat it up! 

7FB4B575-06F4-4A0A-9698-C9701AD041EC.JPG


Corn Succotash

Makes 4 servings


3 corn on the cob

2 Tb olive oil

1 Tsp kosher salt

Fresh ground pepper

1 zucchini

1 jalapeno

3 oz Cotija cheese, crumbled

½ lime

4-6 basil leaves (substitute cilantro if you like)


Light up the grill and heat to 350F or higher. Meanwhile, finely chop the jalapeno, cotija, and basil into a medium sized serving bowl. It’s all going into one bowl so family style works great here! Once the grill is very hot, grilled the zucchini and corn until charred but still have a crunch. If this is the peak of summer, these vegetables should be really fresh so you’ll want to taste that! Leave on the grill for 2-3 minutes per side.

Chop the zucchini into ¼” size pieces and holding the corn cobs vertically cut the corn kernels right into the serving bowl. Hit the entire bowl with the olive oil, lime, cracked pepper, and salt to taste and then give it a big stir. At this point, taste for seasoning and while still warm serve at the table. This succotash makes the perfect leftovers the next day to eat right out of the fridge!

Ben's Famous Eggplant Parmigiana

Full disclosure, my husband is a chef. While he's now on the business side of the food world, he cooked professionally for many years in restaurants and has a few homestyle classics I am lucky enough to enjoy at home. One of them is eggplant parm. The first rule of eggplant parm in our home is Ben only makes it when we can't remember when the last time he made it! This way the meal remains a special treat. This recipe is not what I would call a weeknight staple as it is a bit complicated to make. Ben tries to make this recipe in the summertime since eggplants, tomatoes, and basil are flooding all the farmers markets. However, he also makes it with canned tomatoes in the winter and it is the perfect comfort food on a cold rainy night for a dinner party. While he's making the eggplant parm, I am on  salad duty. I always made a real "ceasar salad" alongside. This Italian American classic meal is a favorite we hope you'll share with your family and friends for years to come. Check out Ben's recipe below! 

45420CEC-7D1A-4617-8B7D-3B18381C2452 2.JPG


Eggplant Parmigiana

Serves 6-8

Prep Time: 3 hours

Cook Time: 1 hour

Total Time: 4 hours


2 large cans whole peeled San Marzano tomatoes (if you can, spend a little more for the good kind, it’s worth it)

¼ cup extra virgin olive oil

3 big cloves of garlic, sliced thin

Kosher Salt

Black Pepper

½ bunch of basil

3 lbs eggplant (any variety will do, but I prefer smaller ones if possible. More flavor and easier to work with)

3 large eggs

1 qt breadcrumbs (any brand works, but homemade breadcrumbs are amazing - recipe on the way)

2 cups canola oil

1 lb fresh mozzarella

6 oz parmigiano reggiano


Sauce

Open the cans of whole peeled tomatoes into a large bowl, and squish the tomatoes between your fingers with clean hands until a chunky sauce is formed. Pour the crushed tomatoes into a large sauce pot, along with the olive oil, sliced garlic, a big pinch of salt, a few grinds of black pepper, and the basil (stem and all). Bring the sauce up to a simmer, put a lid on it, and let it do its thing for the next two to three hours, stirring and tasting occasionally as you go. After a couple of hours of low simmering, the sauce will be a rich red and smell amazing.


Eggplant

I know that home frying can be a little daunting, but shallow-frying is a good first step in that direction. While the sauce is cooking, slice the eggplant into 1/2" thick discs and transfer them to a large colander (strainer). Salt them liberally with kosher salt and let the bowl sit in the sink for 15 minutes. The salt will draw a good deal of moisture out of the eggplant, removing much of its natural bitterness and making them easier to fry. After 15 minutes, use a paper towel or clean kitchen towel to dry off the eggplant slices.

Pour the canola oil into a wide, heavy bottomed pan and heat over medium-high heat. The should be about ½” deep, depending on how wide the pan is. While the oil is heating, get your frying setup ready. Crack the eggs into a medium bowl and whisk them until no strands remain. Place the breadcrumbs in a separate bowl. Working piece by piece, dip the eggplant in egg wash, dredge in breadcrumbs, and carefully place in the oil. Fry for about 1 minute on each side, until the breadcrumbs are golden brown. Once the pieces are done, carefully remove them from the pan and place them on a cooling rack, being mindful not to stack them so they don’t get soggy. You may have to replenish the oil and skim excess breadcrumbs throughout the frying process so the oil doesn’t taste burnt.


Assembly and Cooking

Heat your oven to 375F. Slice or tear the mozzarella into silver-dollar-sized pieces, and get a hand grater ready for the parmesan. Remove the basil stems from the tomato sauce (you can chop them up and put them back in or discard them at this point), and bring your fried eggplant, sauce, and cheeses to your prep area. In a large casserole dish, layer the ingredients as follows: tomato sauce on the bottom, eggplant, sauce, sliced mozzerella, shredded parmesan, eggplant, sauce, cheese... Keep this eggplant/sauce/cheese pattern going until you get to the top of the casserole dish. Finish with a generous helping of cheese on top. Cover the dish with foil and bake for 45 minutes. After 45 minutes, remove the foil and finish baking uncovered for another 15 minutes to get the top cheese nice and bubbly.

Make sure you let the eggplant parm rest for at least 10 minutes before serving! I know it will be tempting to cut right into it, but fresh out of the oven it will still be a bubbling cauldron of tomato sauce and melty cheese. Resting the parm will let it firm up and cool down just a little bit so that it’s easier to cut, serve, and eat. Bon appetito!