Sweet Potato with Miso

So I recently finished watching Salt Fat Heat Acid on Netflix. It’s EXCELLENT! Samin, the host, who is from Berkeley and worked her way up at Chez Panisse, is somewhat of a new age idol. Her show is a mix of cooking technique, recipes, travel, and community all in one. It’s beautiful to watch and Samin reminds me a bit of a Julia Child in that she makes cooking so approachable. In one of the episodes, she travels to Japan to learn about salt. Miso, which Westerners usually know as miso soup, is an umami paste that can turn anything into something really special.

So with not much left at home in the pantry or the refrigerator, I made a “miso butter” with equal parts butter and miso paste and topped a slow cooked sweet potato for lunch. It was good enough I figured I would add the how-to on the site. Hope you find this easy meal a hit for those lonely nights where you’re cooking for one… yep, we all have them!

2F421D54-7975-4C1A-8475-A364F532906D.jpg

Slow Roasted Sweet Potato with Miso Butter

Serves 1

1 sweet potato, white, also works with yellow sweet potatoes or Japanese varieties

2 TB miso paste

2TB butter, organic

1 TB olive oil

Fresh cilantro or Basil

Turn the oven to 300F. Prepare a cookie sheet with parchment paper or a silpat. Coat the potato with a bit of olive oil. Roast for close to two hours, or as long as you can hold out! In a small bowl, mix together the butter and miso paste until well combined. Split the potato and add the paste and top with fresh herbs.

Lamb Meatballs

Meatballs are easy for a lot of different applications from appetizers to a great potluck dish — and they make for a super quick weeknight meal. I use lamb meat because I tend to choose more sustainable options than beef. From time to time I really crave “red meat!” Lamb is almost always pasture raised since lamb/sheep are a great way for farmers to fertilize and mow their grass. This recipe all calls for 1 pan, and a cast iron will yield a super nice crust!

Lamb Meatballs

Serves 3-4

1 LB ground lamb

1 egg

2 anchovies

1 TSP nutmeg

2 slices of day old sourdough

1/2 C cottage cheese, full fat

1 1/2 C tomatoes, crushed or pureed

1 TB olive oil

kosher salt

fresh ground pepper

Turn your oven to 350F. Using a 12” sauté pan or cast iron, brush 1 tablespoon or so of olive oil until the heat is almost smoking.

In a foot processor, put the slices of bread and let run until coarse breadcrumbs are formed. In a large mixing bowl, whisk the egg, nutmeg, cottage cheese and anchovies together. Turn your oven to 350F. Combined with the bread crumbs and mix by hand. Season well with salt and pepper. Using two spoons or a 2” cookie dough scooper, form 2” balls right unto the greased hot pan. See photo for how close the meatballs should be to one another. Sear on both sides, and add the tomato puree to the pan. Place in the oven for 25-30 minutes, until the meatballs are cooked through but still moist.

Serve hot over creamy polenta, braised fennel, a green salad or on their own in a small bowl with a bit of grated parmesan.

Caesar Salad By Way of Chicory Obsession

So this post is a bit full circle from why I started this blog. I started writing about farms and cooking more meals to inspire my friends, family, and Instagram community. What I mean by inspire is encourage people to get involved in their local food communities and connect with people who are a part of the circular food economy like chefs and farmers and seed growers and farm conservators and many more. Jason and Siri from Local Roots Farms are passionate about chicories and grow many varieties after years of research and studies and just plain old trial and error on their farm in Duvall, WA. They wanted to share their passion with Seattle and after hosting a smaller Radicchio celebration with friends and chefs at their farm, this year they launched a full on Sagra Di Radicchio aka “Chicory Week”, a weeklong celebration involving the top Seattle restaurants and other partners in an effort to showcase the delicious plant. When I heard about the event, I knew right away I wanted to attend. It was lovely to meet Jason and Siri, try all of the fruits of their labor, and eat so many savory bites using their chicories! I could not wait to get home and share it with you.

IMG_9765.jpeg

I’ve always had an affinity for bitter flavors. It started with endive. My mom loved the stuff and would use endive in salads for any holidays or dinner parties. Later, I learned to love fennel, embracing the anise flavor in the vegetable that would lead to learning all about amaro. Amaro is a liquor that ranges from very bitter to just a touch bitter and mostly sweet. Italians drink amaro after a heavy meal as a digestive. I would drink it with soda water at lunch as a “light mid-day cocktail” between work meetings. Seriously, try it — it tastes like coca-cola!

Fast forward to today and I am a full-fledged chicory fan. I use all different varieties from the very bitter Radicchio to the slightly sweet Puntarelle in salads, grilled over wood or coals, in soups, and other dishes, too. Chicories are delicious; and once you feel comfortable balancing the bitterness you’ll be a convert!

My favorite bite of the day was from Spinasse, an Italian restaurant with cuisine specific to Piedmonte. Spinasse has become a favorite restaurant of my husband and I. At the Sagra, they served a deconstructed Caesar salad - hard boiled egg, anchovy, lettuce tossed in a light vinaigrette, and big icy shavings of parmigiana cheese. There’s no better time than now to add my take of this salad. I won’t even try to remember all of the times I have made it, because it’s become such a favorite in our home. Use any chicories that are freshest, and ask your farmer his and her favorites too!

IMG_9762.jpeg

Caesar Salad, Kinda

Makes 4 servings

6 anchovies, good quality preferably packed in salt or oil

1 head of Castelfranco lettuce (or any mix of chicories)

2 eggs (the best quality you can afford)

1/2 TSP dijon mustard

1 clove of garlic

Parmigiana Reggiano (the best quality you can afford)

1/2 C olive oil

3 TB red wine vinegar

Start this recipe by adding the two eggs to a small saucepot and covering with water by 1 inch. Bring to a boil and shut off the heat. Cover for 10 minutes, then remove the eggs and place into a small bowl with ice water. While the eggs are going, prepare your lettuce. Theres a great video on the right way to wash your lettuce here.

While the water is boiling, add two anchovies, a small pinch of salt, and garlic to your mortar and pestle and pound until a fine paste. Then add your dijon mustard and red wine vinegar. once it’s well mixed, add the olive oil little by little until it is a smooth dressing. Another video on how to do this here. Taste it for seasoning and add fresh black pepper and salt to taste.

In a large mixing bowl, toss the lettuces with the dressing with your hands. Make sure each piece of lettuce is very well covered in the dressing. Stack the lettuces on a large plate or shallow serving bowl, and top with the remaining four anchovies. At this point, peel your eggs and lightly toss with a little salt and pepper. Cut the eggs in half lengthwise and around the lettuces. For the final touch, using a vegetable peeler shave big slices of parmigiana on top of the salad. Be generous!

Enjoy with some crunchy bread, a bowl of soup, or just on its own.

Baked Pasta with Broccoli Rabe

I am not one to go through the multiple steps of making a pasta and then baking it but once in a while it’s really worth it to get that crusty top and make sure all the flavors combine in the oven. I’ve been thinking of more ways to incorporate dark, leafy greens into dishes. They are so nutritious and delicious! Most of us get in the same rut of using them as a side dish sautéed with garlic or in a stir-fry but there are countless ways to use these vegetables. If you’re a vegetarian, omit the sausage from this recipe. So let’s do it!

CC254AA8-125B-4069-8B52-264BE84160AD.JPG

Baked Pasta with Broccoli Rabe

1 LB medium shells, rigatoni, farfalle, or any similar size pasta

1 LB hot Italian sausage, pork or chicken

4oz grated smoked mozzarella

2 TB chili oil, or red chili flakes

1 large bunch broccoli rabe, washed and chopped into 2” pieces

1 15oz can of tomatoes

1 small yellow onion, diced

Kosher salt

Olive oil

Take out two medium sized mixing bowls, a large stockpot, and a 12” saute pan or cast iron. Fill the stockpot with salty water and bring to a boil. Meanwhile, dice your onions and grate the smoked mozzarella. Once boiling, add the broccoli rabe for 5 minutes or so. Remove with a strainer and add to one of the mixing bowls.

In your cast iron, add 3 tablespoons of olive oil and sweat your onions for 3-5 minutes over medium heat. Then add the sausage. If the sausage are in links, cut through them lengthwise and discard the casing. Brown the sausage and onions but do not overcook. They can be slightly pink in the middle before adding in the can of tomatoes. Bring the pot of water back up to a boil for the pasta. Cook for another 5 minutes or so until the tomatoes have softened and it’s looking like a typical meat sauce. At that point add the broccoli rabe and taste the sauce for salt. Add enough until it’s just right! Cook the pasta for 3 minutes less than the package directions. Once the pasta is done, using the same strainer add the pasta to the tomato sausage broccoli rabe sauce.

Carefully mix the ingredients together in the cast iron, adding in half the mozzarella cheese while mixing. Once it’s well mixed, top the dish with the remainder of the cheese and sprinkle with the chili oil. Cover with aluminum foil and bake at 380F for 30 minutes. Then remove the foil and cook another 5-10 minutes until the top is golden brown. Serve with a simple green salad and bold red wine.

D38FA75F-B0D9-41B9-A7D3-EE94E09FC899.JPG

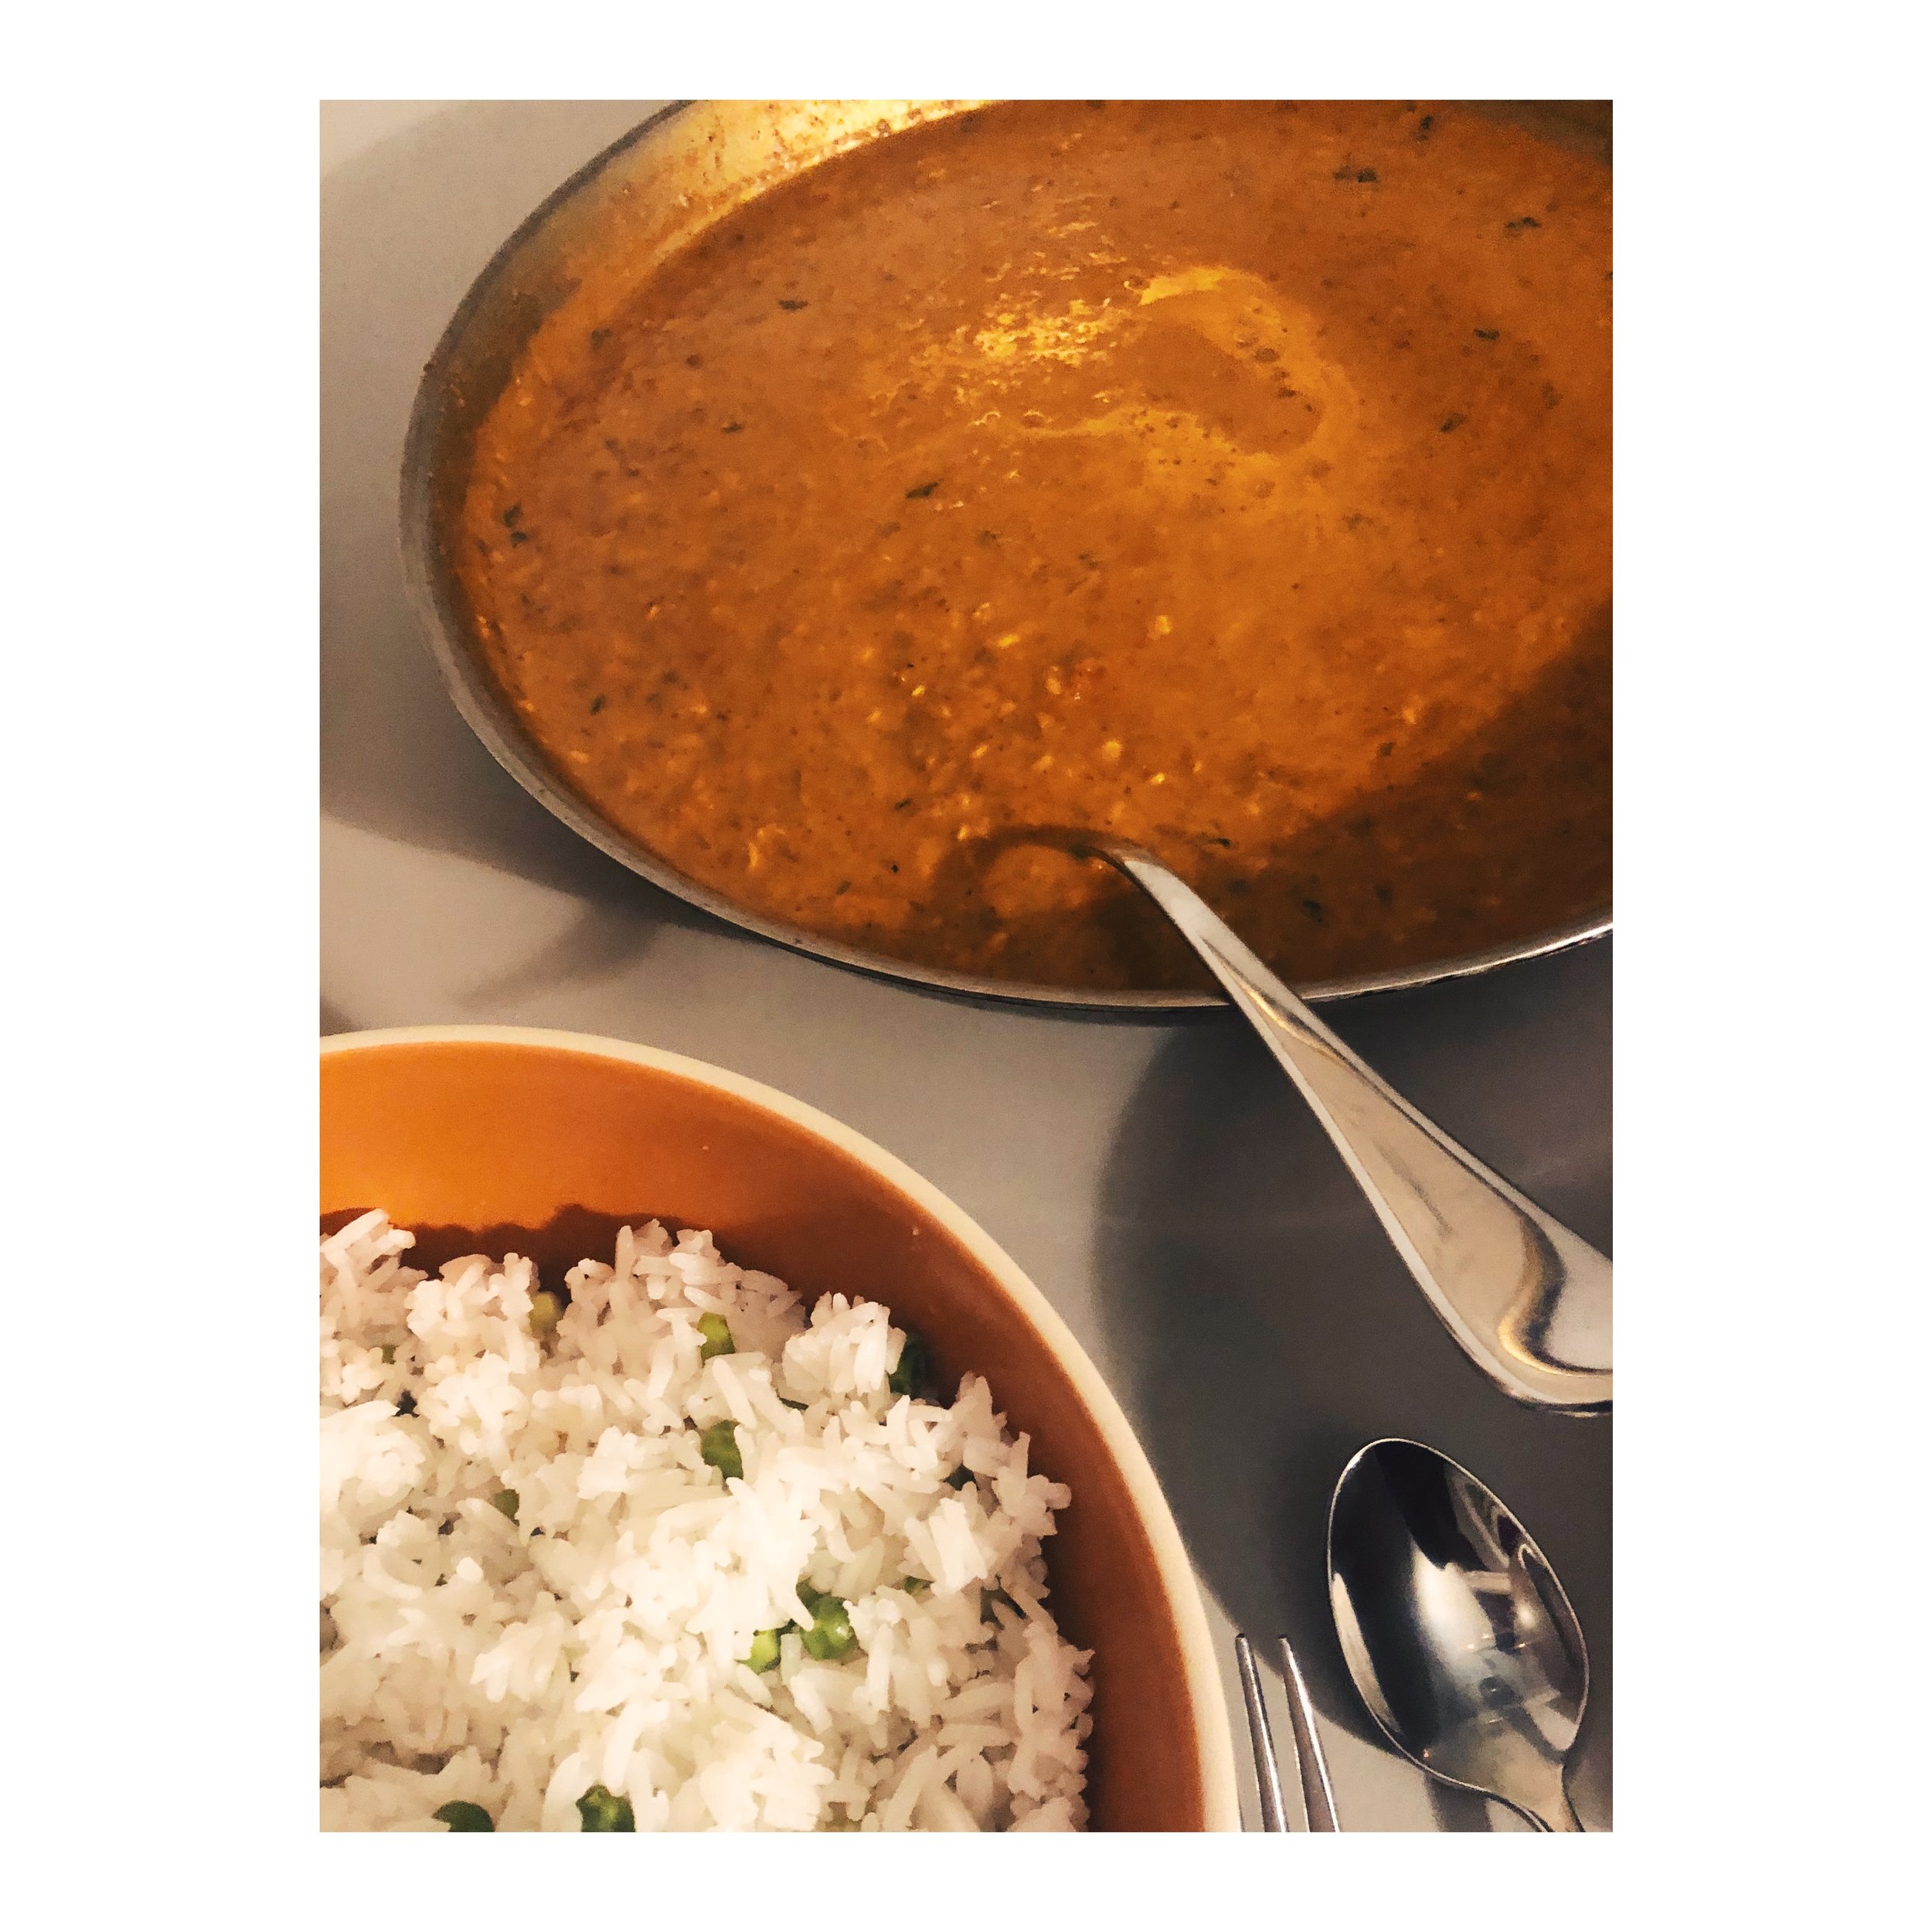
Lentils in Curry Sauce

Holy smokes this recipe was 10 times better than I thought it would turn out. I love lentils and have forever been fond of them since my grandmother would make a french lentil soup often when I was a kid.

I usually keep a jar of lentils in the pantry for weeks when I am trying to curb our spending a bit. They are protein packed, inexpensive, and vegetarian / vegan friendly. I originally intended to make a Southeast Asian curry, with lots of ginger and coconut milk and lime juice. But at the last minute, I was inspired to veer toward warm spices and Indian flavors. My husband and I love the spicy and rich flavors of Indian cuisine. I am constantly looking for more vegetarian recipes to make at home that are satisfying and make for great leftovers. The result of this Indian curry was stellar and I plan to incorporate this dish into our regular weeknight meal rotation! I hope you do as well.

2CD6733C-2B79-4EB2-843D-5F11D8F06856.JPG

Curried Lentils

  • 3 TB coconut oil

  • 3 TB curry powder, or 1 tsp each cumin, coriander, and turmeric

  • 1 head of garlic, chopped finely (10-12 cloves)

  • 1 small yellow onion, chopped finely

  • 1 28oz can of crushed tomatoes

  • 3 TB ginger, chopped finely

  • 1 C dried brown lentils

  • 1 15oz can coconut milk

  • 1 C chopped cilantro


Heat a large saute pan or dutch oven with coconut oil. Add the curry powder and toast for 1 minute. Then add the garlic and onion and saute for 3-4 minutes until softened. Add your ginger and continue to stir until the oil is mostly absorbed. This recipe calls for a lot of ginger so feel free to cut down on it if you are not a huge fan. I can’t get enough of this root! At this point, your ingredients will look like a thick brown mess. Add the can of tomatoes as well as 3 cups of water or vegetable stock and the cup of lentils. Turn the heat on high. Once the liquid reaches a boil, turn the heat to low and cover for 30-40 minutes until the lentils are soft and cooked through. Taste the dish at this point and adjust as needed. For example, add chili powder.

Add coconut milk, and season with salt, cayenne pepper, and fresh cilantro. Stir until entirely combined. Serve over basmati rice and top with a spoon of good quality organic yogurt. Voila, Indian made at home!

** Turn your rice cooker on once you add your lentils. Rinse the rice 2-3 times to remove the starch. I do this right in the rice cooker pot. Then I throw in 2 cloves and 6 cardamom pods. I have a steamer basket in my rice cooker and add in one cup of frozen peas. By the time your curry is complete you can be up and running with an Indian rice pilaf.


2315C78D-4769-4B00-BB06-A1E50DE74DE3.JPG

White Bean Winter Soup

White Bean Soup

In the winter months, I live for a hearty soup with good crusty bread. I find this type of soup incredibly satisfying and comforting. You really feel warm all the way through to your bones! The trick is very good chicken stock. It also helps to have quality beans. I tend to think because it’s very simple, every ingredient really matters. Double the recipe and freeze some for later! The soup is always better the next day so feel free to make it ahead of time.


White Beans Winter Soup


1 quart of cooked white beans, cannellini or gigante

1 quart homemade chicken stock, or buy from your local butcher

2 tb olive oil

2 cloves of garlic, roughly chopped

1 yellow onion, chopped (optional)

1 large zucchini and/or 1 large carrot, diced ¼” thick (optional)

1 small bunch of collard greens, chard or escarole, de-stemmed and chopped 1” pieces

1 dried red Calabrian chili

Salt and Pepper

Parmigiano Reggiano


If using dried beans, soak the beans overnight in a large bowl with plenty of water.


Bring a stockpot or heavy dutch oven to medium heat, add the olive oil, and sweat the chopped garlic. If you love onions, add a chopped yellow onion at this point. Saute for a few minutes until the garlic is cooked and the onion is softened. Add your washed and sliced collard greens. Stir a minute or two and then add ½ cup of chicken stock. Cover for 2-3 minutes until the greens are steamed. Add the zucchini and/or carrots and continue to stir all together. By this point your chicken stock should be mostly gone and your vegetables should be softer but not cooked through. Add the white beans and cover by 2” with liquid, adding the remaining 3 ½ cups of stock. Add water if you need to as well. Bring the pot to a rolling boil and then lower the heat to a simmer. Add the chili and cook with the lid on for 20 minutes. Taste your soup, and add salt and pepper to taste. Are the beans soft? If not, continue to cook with the lid on until they are cooked through. Leave it covered until ready to serve.


In the bowl, drizzle with olive oil and grated parmesan. Serve with good crusty bread! Maybe a glass of red wine. Some gooey, stinky cheese.  Eat on the floor around the coffee table or by a fireplace. OK, you get it.


Salmon Chowder

The farmer’s market is always a source of inspiration to me. I love meeting people and being inspired by what’s fresh. So when I discovered Sena Sea at my local farmer’s market, I immediately stocked up with Alaskan Copper River salmon and cod. Rather than going to a grocery store or fishmonger, I buy directly from the fisherman. The quality of the fish? Perfect!

I was excited to use up some of the other ingredients I had gathered at the market. So with the weather cooling down, a chowder seemed like a nice meal. This is my first attempt at preparing a seafood chowder and it turned out beautifully. I hope you’ll enjoy it in your home! Please feel free to use any variety of good local fish in your part of the world.

D8364240-72F8-489F-AB0E-36439FFCBC2C.JPG

Salmon Chowder

Makes 4 servings

10-12 small creamer potatoes, cut into halves or quarters

1 small leek, cleaned and sliced ¼” thick

1 cup of organic heavy cream

2 quarts fish stock, preferably homemade

2 cloves young garlic, finely minced

Handful of parsley, dill, or chervil, roughly chopped (optional)

1 cup dry white wine, such as sauvignon blanc

2 Tb butter, unsalted

1 lb. small salmon collars, fresh cubed fillets, or chum


In a 5 quart stockpot or dutch oven, heat the butter and sweat the leeks, garlic, and potatoes until softened. This will takes 3-4 minutes. Then pour in the cup of white wine and reduce by half over medium heat. Add the fish stock and bring your soup to a rolling boil. Quickly turn the heat down to a simmer, add your fish, and cover with a lid for 5-7 minutes until the fish is nicely cooked. Add the heavy cream and continue to simmer without the lid until the soup is thickened and your potatoes can be easily pierced with a fork. At this point, season the chowder and adjust to your preference. You could add some heat with dashes of tabasco at this point.

Pour into bowls and top with a tablespoon of fresh chopped herbs. Serve hot with a side of good grilled bread. Bon appetit!


Pear Almond Cake in a Pan

It’s cooled down significantly now that it’s mid-September and rain is on the horizon here in the Pacific Northwest. I am in a full fall moment, cooking braises and warm dishes to distract me from the fact perfect summer weather has come to an end. So when I knew I was having some adventurous eaters over for dinner, I decided to try something new. It was a long week and I didn’t get home until 4:30 on a Friday. I had less than 3 hours to prep a full meal and dessert! Of course, I left dessert until the last second (hour). I knew I had almond meal, eggs, and some ripe pears on hand. This gluten free cake was the result and it was a home-run! I hope you enjoy it. Perfect for breakfast with a cup of coffee or tea the next day, too.

AA6FA7F4-6923-4274-BA6F-BBA013089E06.JPG

Pear Almond Cake In a Pan

Makes 6 servings


2 pears, ripe, peeled, cored, and sliced ⅛” thin

2 Tb unsalted butter

1 pinch of kosher salt

3 Tb granulated or superfine sugar, plus ¼ cup

1 ½ Tb cornstarch or 2 Tb arrowroot powder

¾ cup almond meal or almond flour

2 eggs, white and yolks separated


Turn your oven on to 350F. While the oven is heating up, take out a small saucepan and small 9” cake pan or simply use one non-stick 9” omelet pan for the entire recipe. If you’re using the cake pan, you might want to cut out a 9” round of parchment paper to prevent sticking.


Melt the butter in the nonstick pan. Add your 3 tablespoons of sugar and a pinch of salt. Using a wooden spoon or non-stick spatula stir the mixture over medium heat until it’s a caramel color. This will take 5-7 minutes. Once it the right color, it can burn quickly so be careful. Once you have the color of caramel, remove the pan from the heat right away. Add 1 tsp of almond extract or vanilla extract (optional). Add your sliced pear in a decorative manner. It’s okay if they overlap!


Take out two mixing bowls and a handheld mixer with the whisk attachments. Beat the egg whites until they form “stiff peaks”. See image below. Basically, when you hold the whisk up the egg white shouldn’t droop over. If it does, that’s a “soft peak.”


Image courtesy of https://www.youtube.com/watch?v=zhuRyq7NrcA

Image courtesy of https://www.youtube.com/watch?v=zhuRyq7NrcA

In the other bowl, whisk the egg yolks until light and fluffy. You can do both of these with a stand mixer or by hand with a whisk, it’ll just take some manual effort. Add the ¼ cup of sugar and almond flour to the fluffy egg yolks and combine with your non-stick spatula. This will be a dense, thick cake mix. Add half the egg whites to the batter and fold with your spatula until it is combined. Add the remaining egg whites but be careful not to overmix as you’ll lose all the “air” you just added to the egg whites. Don’t worry if there are small clumps or streaks of white egg white in the batter. Top the caramel pear mixture with the cake mix and smooth out. Place your pan into the oven for 20-25 minutes, until the cake is just set. While still warm, flip your pear cake carefully onto a plate. Serve warm with whipped cream, vanilla ice cream, a dessert wine, or on it’s own.


IMG_3620.JPG

Best Broccoli Ever

A few weeks ago I hinted at the best broccoli recipe ever. It’s my husband’s favorite and takes a simple ingredient and elevates it for any type of eater (vegetarian, vegan, carnivore, etc). It’s a riff on Italian style cooking which uses great olive oil to enhance an inexpensive seasonal vegetable into a great side dish. This broccoli recipe can be substituted with asparagus, cauliflower, brussel sprouts, broccolini or any other hearty vegetable.

63797044-5083-436F-9ED5-033E121412EB.JPG


Best Broccoli Ever


1 head of broccoli

1 fresh small red chili

4 cloves of garlic

¼ cup of olive oil

½ Lemon

Kosher salt


Bring a small 8-10” saucepot with water to a boil. While the water is heating, prepare the broccoli by cutting off the hard end of the stem. Then slice broccoli flowers lengthwise and leave a lot of the stem on. The stems are full of flavor and have a great texture to contrast the head. Place in your serving plate or shallow bowl.


Slice the garlic very thin legnth-wise or just chop into large chunks. Chop the red chili the same way. Fill a mixing bowl with ice water and reserve. Then add kosher salt to the boiling water and add the broccoli for 4-5 minutes. Once it is just barely cooked through, drain into a colander and add to the ice water to stop it from still cooking. Once the broccoli is bright green and cool, drain the broccoli back in the colander.


Place the same saucepot back on the stove and turn on the heat. Once all the water is evaporated, add the olive oil, garlic, and chili. Cook on low heat swirling the pot until the garlic is golden brown. Careful not to let the garlic burn! This should take 60-90 seconds. Add the broccoli to the pot and toss in the garlic chili oil for 30 seconds, using tongs as needed. Squeeze the lemon on top and then plate into the shallow bowl or plate.


Corn Succotash

It’s the end of summer. We just passed Labor Day and for the first time in a long time I am truly sad to see summer wind down. Living in the Bay Area for eight years I actually forgot about seasons! You see right now the weather is just about to become gorgeous in Northern California. They have an “indian summer” meaning that the warmest months are September and October. Now that I am living in the Pacific Northwest I feel a serious weather change. It cooled down substantially. Those days of 90 degrees are not coming back for many, many months. The other huge change is the sunlight! It was incredible to dine outside every night for the past two months and be out on the deck until 9 or 10 PM sitting under the stars, sharing a meal, and having great conversation. Now, by 8PM I’m too cold to be out there and tonight we actually ate… inside!


We still are using our outdoor grill because I refuse to not cook on there until the rain starts. I absolutely love the char on vegetables and fish. We had some Alaskan Salmon fillets and a home-run corn succotash. My favorite part? We used a bunch of last week’s leftover grilled zucchini that was on it’s way to the compost bin if we didn’t save it. Feel free to use fresh grilled or roasted zucchini and not wait a week to eat it up! 

7FB4B575-06F4-4A0A-9698-C9701AD041EC.JPG


Corn Succotash

Makes 4 servings


3 corn on the cob

2 Tb olive oil

1 Tsp kosher salt

Fresh ground pepper

1 zucchini

1 jalapeno

3 oz Cotija cheese, crumbled

½ lime

4-6 basil leaves (substitute cilantro if you like)


Light up the grill and heat to 350F or higher. Meanwhile, finely chop the jalapeno, cotija, and basil into a medium sized serving bowl. It’s all going into one bowl so family style works great here! Once the grill is very hot, grilled the zucchini and corn until charred but still have a crunch. If this is the peak of summer, these vegetables should be really fresh so you’ll want to taste that! Leave on the grill for 2-3 minutes per side.

Chop the zucchini into ¼” size pieces and holding the corn cobs vertically cut the corn kernels right into the serving bowl. Hit the entire bowl with the olive oil, lime, cracked pepper, and salt to taste and then give it a big stir. At this point, taste for seasoning and while still warm serve at the table. This succotash makes the perfect leftovers the next day to eat right out of the fridge!

Chicken Satay with Quick Peanut Sauce

In the last few years I have been so fortunate to have visited Indonesia twice. The country is filled with incredible spices (ie:nutmeg, cinnamon, cacao) and other agriculture such as coffee and rice. While on my honeymoon, my husband Ben and I did a farm trek in the central mountains. We learned so much about how generations of farmers use grafting to yield easier harvesting practices and how they carve out families' plots on shared farmland. It is truly inspiring! 


The food there is fantastic. I will never forget the coconut chocolate ice cream made from from the nut and bean on the eco-farm we stayed at. Many fresh spices and herbs are used to provide each vegetable, dessert, and protein with layers of flavor. Think heat from chilies and garlic, color from turmeric and chocolate, and sweetness from fruit like starfish and coconut. So much grows there it is truly awesome!


I was inspired by Indonesian flavors to come up with a simple marinade and dipping sauce to turn chicken into a Southeast Asian experience. Try out a new adventure with this recipe!

6106B716-1B46-4F52-802E-FAF0F6F813FC.JPG


Chicken Satay with Peanut Sauce

Serves 2


2 Organic chicken breasts, boneless and skinless

1 inch piece ginger or galangal

4 cloves garlic

1 inch piece turmeric (or 1 TSP dried)

1 jalapeno

1 lemongrass stalk

Vermicelli noodles

3 persian or japanese cucumbers or 1 English cucumber

Fresh cilantro and/or fresh mint

2 TB vegetable oil, plus extra for the vermincelli noodles

1 TB soy sauce

1 TB fish sauce

4 Cup water

½ Cup Unsalted peanuts

Kosher salt


Rough chop the garlic, ginger, turmeric, lemongrass, and jalapeno. For the lemongrass, remove the tough outer layer and use only the bottom ⅓ of the stalk. If you have a mortar and pestle, put half those ingredients inside and pound into a smooth paste. If not, you can chop by hand or add the ingredients to a blender or food processor. Add to a pyrex or ziplock bag. Cube the chicken if you plan to layer onto skewers or slice the chicken breast lengthwise in half and add to the marinade. Refrigerate 2 hours, or preferably overnight.

Toast the peanuts in a saute pan or in a 400F until fragrant and they release their oils. You can also buy already roasted peanuts to alleviate this step! Place the peanuts, water, soy sauce, fish sauce, and remaining fresh spices into the same blender or food processor if you used one. Blend for several minutes until creamy and smooth. Taste at this point and check to salt, add pinch by pinch until it suits your taste. At this point, increase the heat level by adding more chopped chili or chili oil. Set the peanut sauce aside in a dish with saran wrap until ready to serve.

Light a charcoal or wood burning grill, once scorching hot, grill the chicken on each side 5 minutes until it’s a bit charred. It should smell very fragrant. Heat a kettle and follow the instructions for the noodles exactly. Toss in a tablespoon or two of canola or sesame oil. On the same platter, add your peanut sauce.

Slice or cut your cucumbers into large bite-sized chunks and add to the platter. Top with freshly picked cilantro and mint. For the last piece, add your skewers or slices of chicken breasts on top of the noodles. Serve hot. This dish is killer with some ice cold beers!

Tomato and Ricotta Tart

I really love tomatoes, especially in the summer when they are so sweet and ripe. I end up overdoing it at the farmer's market and always buy too many. I had seen a gorgeous tomato and ricotta tart and was inspired to make my own. Use any savory pastry crust you like. I used one that had rye flour in it but a store-bought pie crust would work as well. This is pretty quick to make since the baking and prep time is short. Try out this recipe for your Labor Day BBQ and let me know how it turns out in the comments!

12190B08-A1A9-41C4-94C6-EA707B6C82E5.JPG


Tomato Ricotta Tart

Makes 6 servings


2 Cups ricotta, whole milk

½ Cup parmesan cheese, grated finely

1 pie crust

2-3 medium size heirloom tomatoes, or 1 pint of sun gold tomatoes

Kosher salt

Pepper

Fresh herbs (such as dill, basil, parsley, or chives)

Maldon salt


Set your oven to 400 degrees. Roll out your pie crust to ¼” thick and prepare your pie tin or tart pan with a circle of parchment paper at the bottom to avoid the crust from sticking. Add your pie crust and trim the edges. I used a glass pyrex pie dish and trimmed the crust so it would have no overhang at all. Take a fork and prick the bottom of the pie crust in 6-8 spots. This allows steam to release while it’s cooking in the oven. Add another layer of parchment paper on top of the crust and add pie weights. I used a big jar of dried beans. Bake for 20 minutes at 400, then lower to 375F until it’s golden brown and cooked through. This usually takes another 15-20 minutes or so depending on your crust. Once the crust is finished cooking, remove it from the tin and place it on a cooling rack.

In a mixing bowl, add the ricotta, parmesan, salt and pepper. Mix well with a fork and taste. This is your opportunity to add other ingredients if you would like such as lemon zest or dried herbs. I left mine as is. Slice your tomatoes ¼” thick. When the crust has cooled completely, layer the ricotta and smooth out with a spatula or back of a spoon. Then layer the tomatoes decoratively and season with finishing salt and chopped fresh herbs before serving. Serve this the day you assemble it for best results. If you want to prepare the tart the day before, blind bake the crust and make the ricotta mixture and keep it covered in the fridge until you're ready to layer and serve. At peak tomato season this is a real crowd pleaser and perfect for your vegetarian friends. 

Ben's Famous Eggplant Parmigiana

Full disclosure, my husband is a chef. While he's now on the business side of the food world, he cooked professionally for many years in restaurants and has a few homestyle classics I am lucky enough to enjoy at home. One of them is eggplant parm. The first rule of eggplant parm in our home is Ben only makes it when we can't remember when the last time he made it! This way the meal remains a special treat. This recipe is not what I would call a weeknight staple as it is a bit complicated to make. Ben tries to make this recipe in the summertime since eggplants, tomatoes, and basil are flooding all the farmers markets. However, he also makes it with canned tomatoes in the winter and it is the perfect comfort food on a cold rainy night for a dinner party. While he's making the eggplant parm, I am on  salad duty. I always made a real "ceasar salad" alongside. This Italian American classic meal is a favorite we hope you'll share with your family and friends for years to come. Check out Ben's recipe below! 

45420CEC-7D1A-4617-8B7D-3B18381C2452 2.JPG


Eggplant Parmigiana

Serves 6-8

Prep Time: 3 hours

Cook Time: 1 hour

Total Time: 4 hours


2 large cans whole peeled San Marzano tomatoes (if you can, spend a little more for the good kind, it’s worth it)

¼ cup extra virgin olive oil

3 big cloves of garlic, sliced thin

Kosher Salt

Black Pepper

½ bunch of basil

3 lbs eggplant (any variety will do, but I prefer smaller ones if possible. More flavor and easier to work with)

3 large eggs

1 qt breadcrumbs (any brand works, but homemade breadcrumbs are amazing - recipe on the way)

2 cups canola oil

1 lb fresh mozzarella

6 oz parmigiano reggiano


Sauce

Open the cans of whole peeled tomatoes into a large bowl, and squish the tomatoes between your fingers with clean hands until a chunky sauce is formed. Pour the crushed tomatoes into a large sauce pot, along with the olive oil, sliced garlic, a big pinch of salt, a few grinds of black pepper, and the basil (stem and all). Bring the sauce up to a simmer, put a lid on it, and let it do its thing for the next two to three hours, stirring and tasting occasionally as you go. After a couple of hours of low simmering, the sauce will be a rich red and smell amazing.


Eggplant

I know that home frying can be a little daunting, but shallow-frying is a good first step in that direction. While the sauce is cooking, slice the eggplant into 1/2" thick discs and transfer them to a large colander (strainer). Salt them liberally with kosher salt and let the bowl sit in the sink for 15 minutes. The salt will draw a good deal of moisture out of the eggplant, removing much of its natural bitterness and making them easier to fry. After 15 minutes, use a paper towel or clean kitchen towel to dry off the eggplant slices.

Pour the canola oil into a wide, heavy bottomed pan and heat over medium-high heat. The should be about ½” deep, depending on how wide the pan is. While the oil is heating, get your frying setup ready. Crack the eggs into a medium bowl and whisk them until no strands remain. Place the breadcrumbs in a separate bowl. Working piece by piece, dip the eggplant in egg wash, dredge in breadcrumbs, and carefully place in the oil. Fry for about 1 minute on each side, until the breadcrumbs are golden brown. Once the pieces are done, carefully remove them from the pan and place them on a cooling rack, being mindful not to stack them so they don’t get soggy. You may have to replenish the oil and skim excess breadcrumbs throughout the frying process so the oil doesn’t taste burnt.


Assembly and Cooking

Heat your oven to 375F. Slice or tear the mozzarella into silver-dollar-sized pieces, and get a hand grater ready for the parmesan. Remove the basil stems from the tomato sauce (you can chop them up and put them back in or discard them at this point), and bring your fried eggplant, sauce, and cheeses to your prep area. In a large casserole dish, layer the ingredients as follows: tomato sauce on the bottom, eggplant, sauce, sliced mozzerella, shredded parmesan, eggplant, sauce, cheese... Keep this eggplant/sauce/cheese pattern going until you get to the top of the casserole dish. Finish with a generous helping of cheese on top. Cover the dish with foil and bake for 45 minutes. After 45 minutes, remove the foil and finish baking uncovered for another 15 minutes to get the top cheese nice and bubbly.

Make sure you let the eggplant parm rest for at least 10 minutes before serving! I know it will be tempting to cut right into it, but fresh out of the oven it will still be a bubbling cauldron of tomato sauce and melty cheese. Resting the parm will let it firm up and cool down just a little bit so that it’s easier to cut, serve, and eat. Bon appetito!


Lettuces with Vinaigrette

You may now know I serve a green salad year round with almost every dinner meal. There is just no better way to add a pop of freshness and color than a big wooden bowl of soft lettuces and my riff on a ceasar dressing. Feel free to have fun with additions if you like. Peek in the fridge or pantry. Have a few chives? A bunch of radishes? The recipe is perfect as is but you can totally add crisp thinly sliced vegetables, fresh ripe tomatoes, or toasted hazelnuts to the bowl. This is a lovely compliment to almost any foods from roasted chicken and potatoes to pasta or fajitas. 

IMG_6097.JPG


Lettuces with Vinaigrette

Serves 3-4


1 head lettuce, washed and dried

1-2 oil or salt packed anchovies

1 clove garlic, grated or finely minced

1 Tb sherry vinegar

Pinch of sea salt or maldon salt

½ Tsp dijon mustard

1 shallot, optional

3 Tb olive Oil


 For the lettuce, choose 1 head of red leaf, green leaf, butterhead, or a mix of greens such as little gems, endive, treviso, radicchio, escarole.

If you have a mortar and pestle, add the garlic and sprinkle a little salt over it then pound it well. Then add the anchovy, dijon, and sherry. Pound well and drizzle the olive oil while mixing with the pestle. Add the chopped shallot and spoon over and around the washed and dried lettuces.

Taste the lettuce and adjust as needed. Do not be afraid to sprinkle a bit more sherry vinegar or add a pinch of salt. Add cracked pepper on the dressed lettuces to your taste. You can also increase the quantities of the vinaigrette and store it in the refrigerator in a jar. If you add chopped shallots to the vinaigrette it will only last 1-2 days.

Growing your own lettuce or buying from a farmer’s market will greatly increase the outcome of this salad. At the grocery store, I usually stick to radicchio and red leaf lettuces as they lack other varieties. 


Camping Trip Muffins

OK so this weekend my girlfriends are visiting from San Francisco and New York. With all houseguests these days there are bound to be food allergies. So what's a good hostess to do when you're trying to please everyone? Cornbread! This gluten free recipe is delicious whether or not you consume wheat products. We bought tiny blueberries last Sunday at the farmer's market that were looking rather sad by Thursday. Throwing them in the cornbread batter was the perfect solution to stretch their life and be enjoyed by a big group of happy campers!


My friends are in town for a special reason, we're going hiking near Mount Rainier, National Park and one of the tallest peaks in the country. Sadly, we have less than ideal air quality right now with smoke pouring in from British Columbia's fires. We're hoping for the best because we all love to be outdoors and prepare some pretty rad campfire meals, too!


On the menu for the weekend? Vegetable tacos grilled over the fire pit, smoked trout sandwiches, biscuits with butter and honey, and bratwursts with fire roasted peppers, onions, and homemade dill pickles. Yes, it's a schlep to procure all the food, then pack the food, then transport the food. But it really is worth it when you're all sitting around a campfire enjoying a meal together.


Checkout this gluten free muffin recipe and let me know what you think in the comments below.


31C705EB-C0BB-40B2-A1EC-772F29FE48E9.JPG

Gluten Free Blueberry Corn Muffins

(Makes about 18 muffins)


2 Cups 'Cup 4 Cup' flour

1 Cup gluten free finely ground cornmeal

1 Tsp baking soda

1 ½ Tsp baking powder

½ Cup sugar

¾ Cup goat or cow milk

8 Oz yogurt (Greek-style, Sheep, or Cow)

1 Tsp Kosher salt

8 Oz unsalted butter, melted and cooled (1 stick)

2 fresh eggs

2 Cups blueberries, washed and dried


Crank the oven to 375. Grab two medium mixing bowls. In one bowl, add all the dry ingredients. In the other, mix the wet ingredients. Wisk each bowl well, then using a rubber spatula fold the wet ingredients into the dry ingredients until smooth. Careful not to overmix!

Finally, add those blueberries so they are evenly distributed. Now, taste the batter. It should be freaking delicious! If it isn’t, think about if you need to add something. Not sweet enough for your liking? Sprinkle in more sugar to taste or add honey. Is it too thick? Drizzle in more melted butter or add milk one teaspoon at a time until the consistency is a thick pancake batter.

Once you want to lick the spatula clean, grab you muffin tin and butter and flour it. If you prefer, use muffin or cupcake liners. Fill each section just to the top with batter. The muffins bake in the middle rack in the over, turning halfway, for 18-20 minutes. A knife or cake tester should just barely come out clean. These will keep cooking once they come out of the oven, and to remain moist it’s best to undercook them rather than overcook them.

Keep covered in a tupperware or breadbox for a few days. Go ahead and blow those gluten free friends’ minds and mouths!